Pop Up Camper 92 Rendezvous self made Bicycle Rack

Every time I think of riding our bikes  I think of the lyrics to a song by  Queen “Bicycle race”! I don’t know about you but bringing our bikes camping adds to the  fun and is  great exercise. It also provides a quick way to get to any of the facilities at a camping park.  I like the basket on it too so I can pack a picnic and all my camera gear. This rack was made by my husband after he saw different examples on the web.  Thanks for all the previous posts it helps. We loaded our 2 bikes on this last weekend and it worked great. It was sturdy and didn’t bump or rattle our bikes around at all. It rode well for the total of about  12 hours round trip.  My husband was a journey man line man so he knows how to tie those knots too. 🙂 I watched and “assisted” him with this and there is minimum tools needed. Just the basics like a drill, bits, crescent wrench and


a socket set. 

I have gotten great shots of wildlife when we ride too. EX: deer coming out of the woods lots and lots of birds. Sometimes our moon shots are the best when we ride at night and can get the perfect angle we couldn’t get in our vehicle. It cost about $60.00 total and it is easy to use. This is a lot cheaper than buyer those ready made ones online or at the store. Just drop it down after getting the bikes off. It can actually hold several bikes on this rack.  It took about an hour to put this all together and it was ready to use. We thought about using pins but felt it was more secure with the lock nuts etc. That way if we stop anywhere on the way it would be harder to steal and get them down.  Make it take it and have some fun.  Let me know how yours turns out. 

Pop Up Camper redo When you gotta go you gotta go! Step 15 Portable Potty

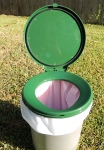
Our pop up doesn’t have a bathroom but we only plan to camp for now at places that  have restrooms/showers facilities. But we wanted to be prepared with an easy and cheap “emergency” alternative if needed. I had read a lot about the bucket port a potty. I wasn’t sure if it would be easy to find a bucket that would fit the snap on toilet lid seat that I bought.  I happen to have a brand new orange Home depot bucket and tried that. It fit like a charm. I didn’t like the color so I just painted it. Don’t you just love Rust-Oleum spray paint ? It covered very easily. I purchased replaceable bags for “emergency” usage and also plan on having kitty litter to absorb any smells or mess. This will be a great substitute if needed but easy enough to keep on hand and empty asap. Would you use this if you had to? I know we will if needed and it sure beats going out in the woods in the middle of the night!!!!! Have potty will travel!

Pop Up Camper Redo new tires Step 19

What fun is it to do all this work and not be safe on the road? After doing all the interior work it was time to do some exterior prep to get it ready to take it out.  We couldn’t find any tires/wheels in our area that we needed so we decided to order some and have them delivered. We are pleased with them. It is now safer and makes it look so much better!  We are ready to rock and roll!

Pop Up Camper Redo finished interior Step 18

Putting all your ideas and work together is the funnest part. It now fits us and we love the colors and brightness.  As we worked on it we brought our family pet inside with us so he could get used to it. He liked it so much I made him his own special pillow for it. I know there will always be things I want to do to it but that is the fun project part of it.  I put in a better than average stick on floor tiles to complete the look. I am sure I will have  a  “to do list” when we take it out for the first time.  Now if the weather will cool down a bit we can finish the outside and hit the road soon! I’ll report our adventures/tips and trips as we go along.  What’s your favorite place to camp ?

Pop Up Camper Redo Accessories Step 17

I am always looking for a way to recycle and up-cycle what I have on hand. I knew we would need something to store our personal stuff like our books, phone,maps etc. I had a shoe organizer that I wasn’t using and and cut off the bottom to make see thru pockets for both organizers. I measured the area to fit right under the pop out bed area and sewed it all together and put velcro on the top.  I hot glued the other side of the velcro strip to the wood under the mattress.  They worked perfectly. I had the top part of curtain panels that had metal rings in them. I hated to throw them away and  figured out a way to make them into the organizers but using them upside down. Things like a flashlight, keys etc can be clipped on them. I also cut strips from the scraps and sewed them on washcloths so we could keep them separate from our regular ones and would be easily identified when sorting. I had tons of containers that were great for small quanities for camping so I found a cute duct tape with owls on it to cover them with. I sprayed painted some of the lids to match. This will also allow me to use them exclusively for the camper. While “junk” shopping I  found some wire racks for 1.00 apiece that just needed a good cover of spray paint to make them like new.  All these projects just made our camper more personalized just for us. What do you recyle or up-cycle? 

Pop Up Camper Redo- Counter tops Step 16

I had to make a decision about the countertops. They were in good shape but didn’t really blend in with the new color theme and needed a pop of color. Since we love to travel and I had a box full of maps from our trips I thought it would be the perfect touch I was looking for. Also it was free and as we looked at the maps it would bring back memories of our past trips. I knew I wanted one side to be local maps and the longer countertop to include the whole USA  map including Hawaii and Alaska. The quotes and edges were used along the ledges of the counters to give it a finished look.  Mod Podge was the best adhesive to use. It was easy to apply with a paint brush and didn’t have a strong scent.  I liberally applied the Mod Podge on the countertop and applied torn or cut pieces of the maps. Then I applied it liberally on top of the maps. I let it dry for 24 hours and touched up any area that needed sealing. After the second drying period I sprayed it with a Mod Podge spray sealer. The sealer had a very strong scent and you need to make sure you have ventilation when you use it. After 24 hours it was sealed and protected. I love the unique results and it matches our personality perfectly! Do you have a use for your old maps?

Pop Up Camper Redo- Painting interior before & after Step 15

Paint can make such a difference. All the cabinets, benches and bins were painted. It really did brighten it up tremendously.  First I sanded them all with a light grit sand paper. I put on a primer coat and then painted it with at least 2 to 3 coats.  This included the inside and outside of the cabinets.

What a difference! After the painting:

Pop Up Camper redo pillows Step 14

I love-making pillows. It is so therapeutic. Whether it is made from a pattern or using an idea that I have in my brain it is relaxing and let’s me use the creative part of my brain. With this camper redo of course there had to be pillows. Pillows of all shapes and sizes.  The theme and colors were tied together through the pillows. Some are connected to nature, personality and inspiration. The scraps from all the other projects left plenty of material to make the pillows. I bought a few remnants and accessories to tie them all together. I learned a new technique using  

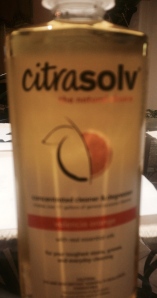
Citra Solv – Cleaner & Degreaser Natural Concentrate Valencia Orange

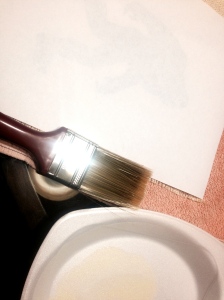
This is great stuff. It does have a strong smell so I would recommend doing it outside or in a well vented area.  It looked a little intimating at first but once I got the hang of it was a breeze. Make sure you print your pictures/words on a copier that uses toner ink. Also you have to print the image especially with words on the mirror image setting on the printer. The tighter the weave on the fabric makes better results.Not all my pillows were images using the Citra solv method. It was bought on Amazon.com. You need: Citra solv, a sponge or small paintbrush, glass or metal bowl, old towel to protect surface,large metal spoon, printed design, straight pins to hold down design on fabric, iron( option).  I am including the process below shown by pictures. BEWARE it is addicting 😉  Hope this inspires you to do your own. What pillows would you make?

Citrasolv

Citrasolv-A little goes a long way.

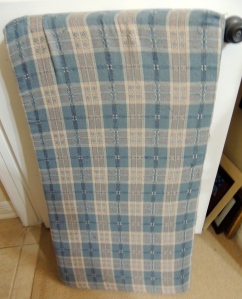
I suggest putting an old towel down on either a glass top or something hard that is not porous.

I suggest putting an old towel down on either a glass top or something hard that is not porous.

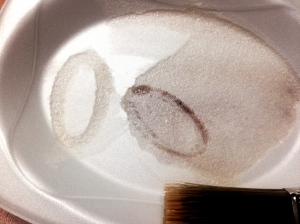
Do not use styrofoam it eats right through it. Use a glass, ceramic or non porous container to hold the Citrasolv

Do not use styrofoam it eats right through it. Use a glass, ceramic or non porous container to hold the Citrasolv

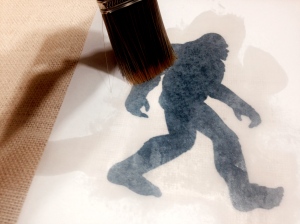
lay and pin the paper face down on the material and just paint the Citra solv on the paper.

lay and pin the paper face down on the material and just paint the Citra solv on the paper.


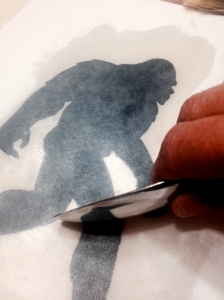
I chose to use a metal spoon turned on it's side to run the paper.

I chose to use a metal spoon turned on it’s side to rub the paper.

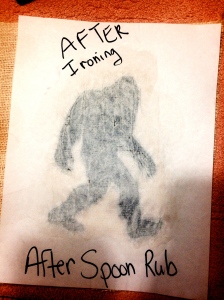
After rubbing it with the edge of the spoon I ironed it to set the ink on the fabric.

After rubbing it with the edge of the spoon I ironed it to set the ink on the fabric.

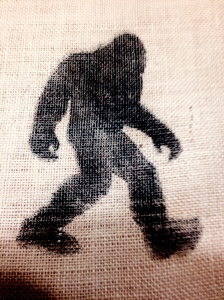
This is after the steps. I hand washed them all to get the citra solv off and then prepared them for sewing the pillows.

This is after the steps. I hand washed them all to get the citra solv off and then prepared them for sewing the pillows.

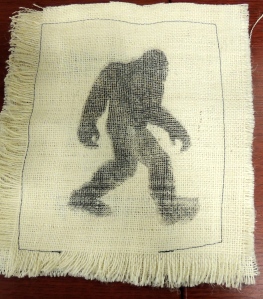
I sewed it together and pulled the strings to make a fringe all the way around to give it more of a rustic look.

I sewed it together and pulled the strings to make a fringe all the way around to give it more of a rustic look.

Pop Up Camper redo pendant garland Step 13

Accessorizing is one of the funnest parts for me, especially recycling what supplies I have on hand. I had scraps of fabric from all the material I used for the curtains and slip covers. I had picked up a few remnants as well. I wanted something that would be light and airy but wouldn’t interfere with the air flow toward  one of the pop up sleeping areas. I had a pendant garland on hand that I had used for parties and used that as a template to make my own. After deciding which pattern of colors to go with the rest was easy. I cut out the same number of colors of each pattern twice. Sewing them was super quick and I used biased tape to sew and connect them together. I only used it on one side which was the bigger side. Now it feels like a defined space and it isn’t too bold or feminine. What do you think about accessorizing your space?


Pop Up Camper Cushions Redo Step 12

Time to get the sewing machine going again.


It was time to tackle the cushions. The fabric was outdated and I didn’t like the texture.  The fabric was in good shape so I decided to just wash them and used them under the new slipcovers. The price of new foam can be quite expensive so I salvaged that as well. I did use the original cushion covers as templates and instead of zippers I used velcro for easy access to wash them if needed. While looking at fabric and comparing prices and textures I decided to used heavy duty curtain panels and a cotton tablecloth to cover them with. It was easy to sew and will be very sturdy for camping life.  I save all the scraps from the redo for projects I will be sharing soon.  What do you think? Would you completely get everything new or repurpose some of it and add new life to it?

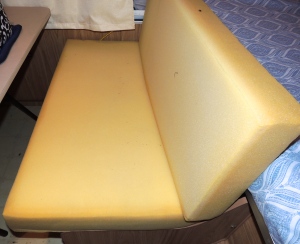
Bench cushion before. I wanted to reuse the foam so I washed the original covers and planned to just cover that with new fabric.

Bench cushion before. I wanted to reuse the foam so I washed the original covers and planned to just cover that with new fabric.

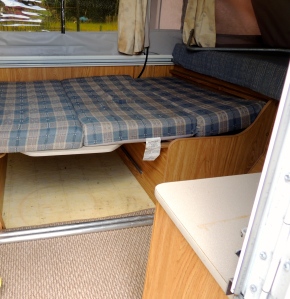
Here are the cushion before the redo. I didn't like the age, color or texture of the fabric. They were good shape so I reused the foam.

Here are the cushion before the redo. I didn’t like the age, color or texture of the fabric. They were  in good shape so I reused the foam.

The bench cushion's foam was in excellent condition. I took off the original slipcovers and let the foam air out for several days.

The bench cushion’s foam was in excellent condition. I took off the original slipcovers and let the foam air out for several days.

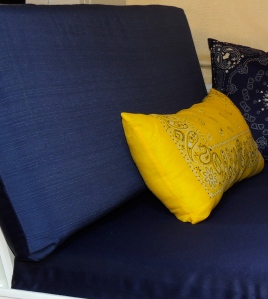
Bench cushions after and ready to use.

Bench cushions after and ready to use.

Bench Cushions after and set up by the table. I like how the top cushions are two sided to give it texture and variation in the blue colors.

Bench Cushions after and set up by the table. I like how the top cushions are two sided to give it texture and variation in the blue colors.